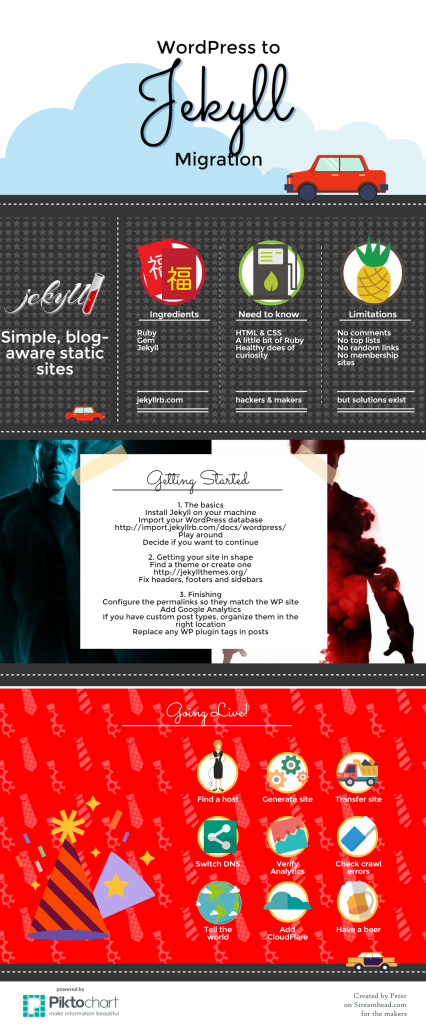
Jekyll is a static site generator. It allows you to run a blog on a minimal server with minimal security worries and no spamming. Because it’s all based on files, it tends to be a bit more technical than blogging in WordPress. I’ve previously written about Jekyll, but now it was time to actually migrate a site from WordPress to Jekyll.
For those who are following, this is make #3 of the 2016 maker challenge. There are at least two more ideas for more makes in this post. Let me know if you want to team up 🙂
Last month, I migrated the marketing site of my old side project, FCTR.be.
- Everything combined, it took me about 8 hours, spread over 2 weeks. If you do this in one go, it will be quicker.
- Finding a theme was the major hurdle. The community is much smaller. Even if you want to pay, the options are limited. (Some one should create a WP theme to Jekyll converter)
- Migrating content, even custom post types was smooth.
- Square bracket special tags that are used by images and some plugins, were not automatically converted and had to be adapted manually.
- Jekyll itself is well documented. The template language Liquid also has ok documentation. The interaction between the two was not-so-well documented.
- Permalinks in Jekyll are very flexible. I didn’t need to create any rewrites.
- Pagination in Jekyll is messy. Unless you start developing a Ruby plugin, you can’t page by category or tags. Because there are a limited number of posts on the site, I resorted to a client-side jQuery plugin.
- Free hosting on GitHub has limitations that you may not want to live with.
- Why isn’t there a desktop or web app that wraps Jekyll in a nice UI? It’s dirt cheap to host and scale Jekyll sites.
- Here’s an overview of the migration process (click for full size):
